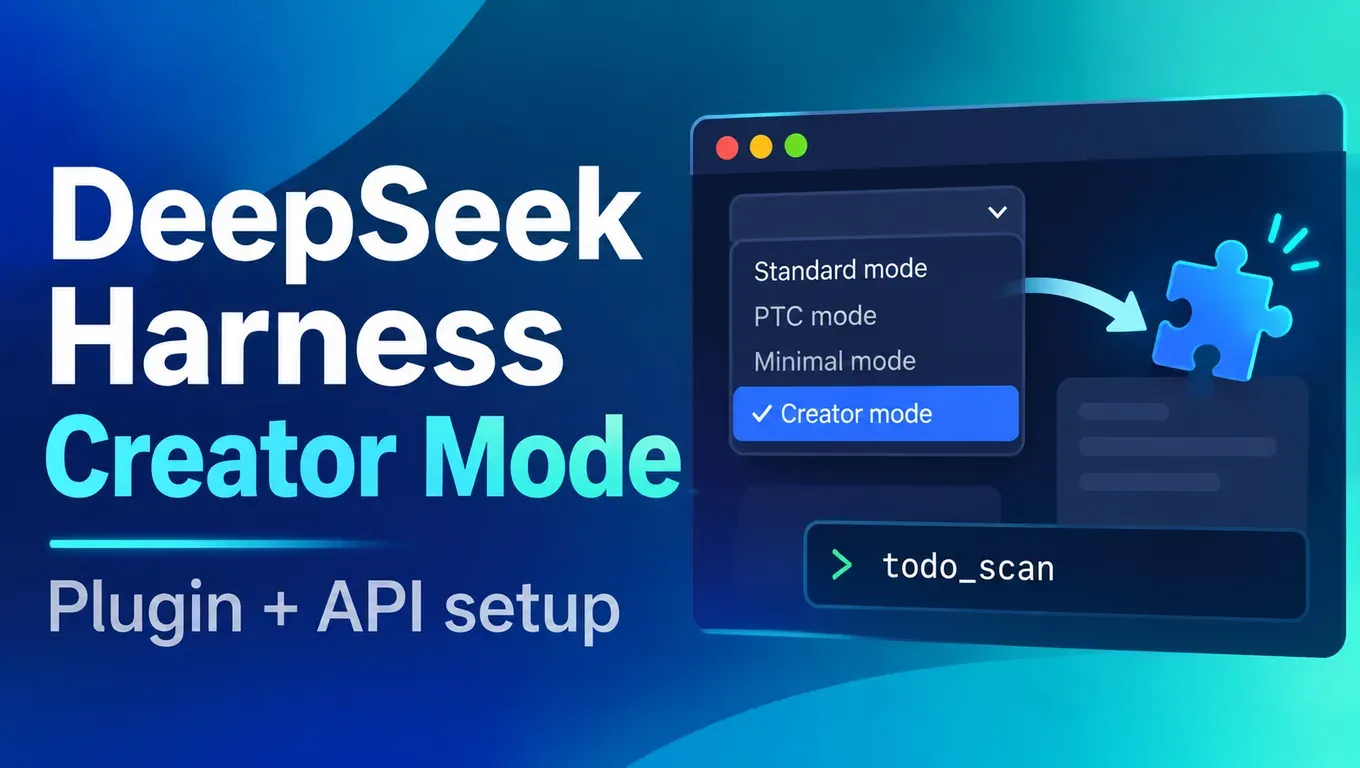
要点:Creator Mode は、DeepSeek Harness そのものを拡張するためのモードです。欲しいツールを一文で伝えると、エージェントがプラグインを書き、現在の profile にインストールし、読み込まれたかを確認します。
- @DeepSeekHarness の公式投稿(11 月 2 日)によると、Creator Mode はアイデアを使えるプラグインに変える機能で、デモではデザイン用ワークスペース、サンドボックスゲーム、3D の LLM 可視化ツールが紹介されています。
- Harness は
npx @deepseek-ai/dsh webで起動できます。11 月 3 日午後(北京時間)に Linux で 0.2.1-rc.5 を検証したところ、依存関係のインストールは約 37 秒でした。 - 「Custom model API」に対応しており、Base URL・プロトコル・Key を入れれば OpenAI 互換のサードパーティ API につながります。aicodewith を接続したところ、
claude-sonnet-5-5、gpt-6.1-sol、deepseek-flashのいずれもツールを正しく呼び出しました。 - Creator Mode で
todo_scanプラグインを作ると 1 分 33 秒で完了。6 ファイルを書いてインストールまで行い、新しいセッションと headless モードからの呼び出しでも正しい出力が返りました。
API Key を作成して、DeepSeek Harness・Claude Code・Codex・Cursor で Claude と GPT を使う →
DeepSeek Harness と Creator Mode とは
DeepSeek Harness(コマンド名 dsh)は DeepSeek が公開しているオープンソースのエージェントハーネスで、GitHub で MIT ライセンスで提供されています。スローガンは「Everything is a Plugin」。ツール、スキル、UI パネル、さらにモードまでがプラグインで、Cordis というプラグインフレームワークの上で組み合わされています。現在は開発者プレビューで、README には今後互換性のない変更があると明記されています。
Web UI で新しいセッションを作るとき、4 つのモードから選べます(検証時の UI 表記をそのまま掲載):
| モード | UI の説明 |
|---|---|
| Standard mode | コード、ファイル、情報を扱う。ほとんどのタスク向け |
| PTC mode | Standard の機能をすべて含み、ツールをまとめて呼んで結果を整理するタスクに向く |
| Minimal mode | ターミナルと画像読み取りだけ。基本性能のテストや比較向け |
| Creator mode | 会話で DSH をカスタマイズ。機能や UI を追加するプラグインを書かせたり、ツールとプロンプトを組み合わせて独自モードを作ったりできる |
公式の 動的プラグインガイド と Agent Preset の README によると、Creator Mode の内部 id は cordis です。Standard と比べて、次の 3 つが加わります:
- ランタイムの確認:読み取り専用ツール
cordis_inspect_listとcordis_inspect_queryで、実際のサービス、ツールのスキーマ、設定のスキーマを確認できます。ソースコードから API を推測する必要がありません。 - プラグイン管理:
plugin_managerツール(Standard にもあります)で Bundle のインストール、有効化、無効化、削除ができます。プラグイン設定は現在の profile に属し、その全セッションに反映され、再起動後も残ります。 - 作成用スキル:
cordis-plugin-developmentなどのスキルが自動でマウントされ、プラグイン、Bundle、モードの書き方の手順とテンプレートが入っています。
使うモデルは、モデル選択で選んだものです。新規セッションの選択肢のほか、Plugins 画面の Add plugin メニューにも「Let the agent create a plugin」があり、同じ Creator の流れに入ります。
第三者の情報(参考):
- @rohanpaul_ai によると、この機能自体は 8 月からあり、11 月 2 日に公式がデモ動画と 7 つの作例のプロンプトを公開したとのことです。
- @testingcatalog によると、Creator Mode ではゲームから仕事用まで、さまざまな用途の再利用できるプラグインを作れます。
- ユーザー @superalesha によると、Kimi、GLM、MiniMax、DeepSeek などのオープンモデルを Harness で動かしており、「プラグインで GPT モデルも追加した」そうです。
DeepSeek が Harness をベースに作ったもう一つのプロジェクト Super-agent については、以前の DeepSeek Super-agent と dsh-superagent プロトタイプの検証記事 をご覧ください。本記事では繰り返しません。
DeepSeek Harness のインストール
Node.js(検証では 22.23)を用意して、次を実行します:
# Node.js 22 or newer
npx @deepseek-ai/dsh --version
# 0.2.1-rc.5

npx @deepseek-ai/dsh web
# dsh web: http://127.0.0.1:3080/?token=...
ローカルで起動するとブラウザが自動で開きます。サーバーや SSH で動かすときは --no-open を付けると、アドレスだけが表示されます。アドレスには token が含まれるので、その完全なリンクを開いてください。http://127.0.0.1:3080/ だけでは 401 になります。
Web UI を開かずターミナルで 1 回タスクを実行したいときは headless モードを使います。回答は stdout、診断情報は stderr に出るので、スクリプトや CI に向いています。オプションは公式の CLI ヘルプ を参照してください。
公式の 安全に関する注意 では、Harness はモデルが生成したコードやコマンドを実行し、サードパーティのプラグインを読み込み、セキュリティ監査を受けていないと注意喚起しています。使い捨ての VM、コンテナ、専用ディレクトリで動かし、重要なプロジェクトや認証情報のそばでは動かさないでください。
DeepSeek Harness にサードパーティ API(aicodewith)を接続する
モデルの設定は Settings → Models です。DeepSeek のカードと組み込みのサードパーティ提供元のほか、Custom model API を選べば中継サービス、社内ゲートウェイ、セルフホストのサーバーにつなげます。公式の モデル設定ガイド によると、プロトコルは OpenAI Chat Completions、OpenAI Responses、Anthropic Messages の 3 種類です。
API Key を作成して DeepSeek Harness に接続 →
方法 1:Models 画面で入力する
Settings → Models → Add model provider → Custom model API
  Provider ID   aicodewith
  Base URL      https://api.aicodewith.ai/v1
  API protocol  OpenAI Chat Completions
  API key       (your aicodewith key)
  Models        claude-sonnet-5-5, gpt-6.1-sol, deepseek-flash
保存するとモデル選択に 3 つのモデルが表示されます。画面で保存した Key は ~/.dsh/.credentials.yaml に書かれ、設定には参照だけが残ります。
方法 2:設定ファイルを直接書く
画面が書き込むのは profile の cordis.patch.yml です。dsh web で起動したときの profile は web、headless では headless です。検証で使ったのはこのファイルです(Key は環境変数で渡し、ファイルには書きません):
# ~/.dsh/profiles/web/cordis.patch.yml
- id: llm-pi-ai
  config:
    providers:
      aicodewith:
        displayName: aicodewith
        apiKeyEnv: AICODEWITH_API_KEY
        api: openai-completions
        baseURL: https://api.aicodewith.ai/v1
        models:
          - id: claude-sonnet-5-5
          - id: gpt-6.1-sol
          - id: deepseek-flash
- id: agent-default-model
  config:
    provider: aicodewith
    model: claude-sonnet-5-5
起動前に Key をエクスポートします:
export AICODEWITH_API_KEY="YOUR_API_KEY"
npx @deepseek-ai/dsh web
Windows PowerShell:
$env:AICODEWITH_API_KEY = "YOUR_API_KEY"
npx @deepseek-ai/dsh web
設定の変更は再起動なしで次のリクエストから反映されます。まず一言送って確認します:
npx @deepseek-ai/dsh headless "Reply with exactly: harness ok"
# harness ok
検証結果(11 月 3 日、北京時間):
| テスト | モデル | 結果 | 所要時間 |
|---|---|---|---|
| 一言返答 | claude-sonnet-5-5 | harness ok を返した | 4.5 秒 |
| 一言返答 | gpt-6.1-sol | harness ok を返した | 3.7 秒 |
| hello.py を書いて実行(write と bash のツール呼び出し) | claude-sonnet-5-5 | 5050 を出力 | 8.2 秒 |
| 同上、Anthropic Messages プロトコルで Base URL を https://api.aicodewith.ai に | claude-sonnet-5-5 | harness ok を返した | 3.0 秒 |
DeepSeek 自身のモデルを使うなら、モデル一覧に deepseek-flash を追加するだけです。詳しくは DeepSeek V4.1 Flash 1017 の変更点と Claude Code / Codex での使い方 を参照してください。
Creator Mode で初めてのプラグインを作る:todo_scan
目標:TODO や FIXME を含む行を探して ファイル:行番号: 内容 を返す todo_scan ツール。最大 50 件。
Web UI でモード選択を開いて Creator mode を選び、次の依頼を送ります(モデルは claude-sonnet-5-5、権限は既定の Workspace Write):
Write a DSH plugin that adds a tool named todo_scan. It takes an optional path
(default: the working directory), recursively scans text files for lines
containing TODO or FIXME (skip node_modules and .git), and returns a list of
file:line: text entries, at most 50. Install it into this profile and verify
it loaded.
プラグインのインストールは高い信頼が必要な操作なので、途中で 1 回確認が出ました。Allow once をクリックしています。完了時の返答(抜粋):
Completed in 1m 33s

The todo_scan plugin is installed and loaded, and a test call returned correct results.
Install: @local/todo-scan installed with application: applied and no warnings.
Tool registration: todo_scan appears in the live tool list with the schema from my plugin.
...
It skips symlinks, binary files and files over 1 MiB.
If more than 50 matches exist, it returns 50 and marks the result as truncated.

Edited 6 files  +147 -0
作業ディレクトリに生成されたプラグインの構成:
todo-scan/
├── package.json        # "dsh": { "bundle": { "patch": "./cordis.patch.yml" } }
├── cordis.patch.yml    # inserts the plugin into the profile
├── index.js            # 127 lines: registers the todo_scan tool
├── icon.svg
└── locale/
    ├── en.json
    └── zh.json
ポイントは cordis.patch.yml と index.js です。前者は Harness にこのプラグインを profile へ挿入するよう指示します:
# todo-scan/cordis.patch.yml
- insert:
    - id: todo-scan
      name: '@local/todo-scan'
      config: {}
後者がツールを登録します。書き方は公式の 初めてのプラグイン チュートリアル と同じで、name、inject、apply をエクスポートし、apply の中で ctx.tools.register を呼びます:
// todo-scan/index.js (abridged)
export const name = 'todo-scan'
export const inject = ['tools', 'workingDirectory']

export function apply(ctx) {
  return ctx.effect(() =>
    ctx.tools.register({
      name: 'todo_scan',
      description: 'Recursively scan text files for lines containing TODO or FIXME ...',
      parameters: {
        type: 'object',
        properties: { path: { type: 'string', description: 'File or directory to scan ...' } },
        additionalProperties: false,
      },
      output: { schema: { /* entries: string[], truncated: boolean */ }, render: (_a, v) => [/* text */] },
      async execute(args, exec) {
        const cwd = await ctx.workingDirectory.ensure(exec.agent, exec.signal)
        return scan(args.path ? resolve(cwd, args.path) : cwd, exec.signal)
      },
    }),
  )
}
インストール後、profile の package.json に link: の依存と、bundles に @local/todo-scan が追加され、再起動後も残ります。
プラグインを確認する
新しい Standard セッションで todo_scan を呼ばせると 7 秒でした。わざと TODO を 60 行含むファイルを置いておいたところ、ちょうど 50 件で打ち切られました:
many.txt:1: TODO item 0 many.txt:2: TODO item 1 ... many.txt:50: TODO item 49 (truncated at 50 entries)
次に node_modules と .git を飛ばすかを確認しました。demo/node_modules と demo/.git にも TODO を置き、プラグインを headless の profile にインストールしてコマンドラインから呼び出します:
npx @deepseek-ai/dsh plugin --profile headless add link:/absolute/path/to/todo-scan
# dependencies:
# + @local/todo-scan <- .../todo-scan
# Done in 23ms using pnpm v12.15.0

npx @deepseek-ai/dsh headless --json "Call the todo_scan tool once with path demo and paste its raw output verbatim, nothing else."
{"type":"tool_call","tool":"todo_scan","input":{"path":"demo"}}
{"type":"tool_result","status":"completed","result":"src/app.py:2: # TODO: handle empty input\nsrc/app.py:4: # FIXME: off by one"}
{"type":"final","text":"src/app.py:2: # TODO: handle empty input\nsrc/app.py:4: # FIXME: off by one"}
返ってきたのは src/app.py の 2 行だけで、node_modules と .git の中は飛ばされました。同じプラグインを 3 つのモデルで呼んだ結果:
| モデル | todo_scan を呼んだか | 出力 | 所要時間 |
|---|---|---|---|
| claude-sonnet-5-5 | はい | 2 行、正しい | 5.5 秒 |
| gpt-6.1-sol | はい | 2 行、正しい | 6.9 秒 |
| deepseek-flash | はい | 2 行、正しい | 7.6 秒 |
よくあるエラー
Key が間違っている:
{ERR401}
AICODEWITH_API_KEY に Key が完全に入っているか、前後に空白がないかを確認します。
環境変数をエクスポートしていない:
dsh: MISSING_CREDENTIAL: llm-pi-ai: no credential for provider route "aicodewith"; its profile
resolves AICODEWITH_API_KEY, which is not set — store AICODEWITH_API_KEY through the credentials
service (the web Models page writes it) or export it ...
apiKeyEnv に書いた変数は、dsh を起動するターミナルでエクスポートしておくか、Models 画面で Key を一度保存してください。
既定モデルがリストにない:
dsh: UNKNOWN_MODEL: pi-ai provider "aicodewith" has no configured model "claude-sonnet-9"
agent-default-model の model は、その提供元の models リストに含まれている必要があります。
ゲートウェイが知らないモデル id:
{ERR400}
モデル id は aicodewith のモデル一覧に合わせるか、Models 画面の Fetch available models で取得してください。
| 症状 | 原因 | 対処 |
|---|---|---|
| http://127.0.0.1:3080/ が 401 | 起動時の token が付いていない | ターミナルに出た完全なリンクを開く |
| AUTH: 401 | Key が誤りか削除済み | 正しい Key に替える |
| MISSING_CREDENTIAL | 環境変数が未エクスポート | エクスポートするか Models 画面で Key を保存 |
| UNKNOWN_MODEL | 既定モデルが models リストにない | リストにモデルを追加 |
| INVALID_REQUEST: 400 モデルが存在しない | ゲートウェイが id を知らない | モデル一覧に合わせて id を直す |
| プラグインを入れたのにツールが出ない | 読み込まれていないか読み込み失敗 | Creator Mode でインストール済み Bundle と警告を確認させる |
Claude Code / Codex / Cursor で同じことをするには
Harness のプラグインは「エージェントに新しいツールを足す」ものです。ほかのクライアントで一番近いのは、Skill(手順とスクリプトをフォルダにまとめたもの)を書くか、MCP サーバーをつなぐ方法です:
| クライアント | Skill の置き場所 |
|---|---|
| Claude Code | ~/.claude/skills/<名前>/SKILL.md |
| Codex | ~/.agents/skills/<名前>/SKILL.md |
| Cursor | ~/.cursor/skills/ または ~/.agents/skills/ |
書き方と呼び出し方は Agent Skills の使い方:Claude Code / Codex のインストール先と呼び出し方 を参照してください。
これらのクライアントも aicodewith につなげます。Claude Code:
export ANTHROPIC_BASE_URL="https://api.aicodewith.ai"
export ANTHROPIC_AUTH_TOKEN="YOUR_API_KEY"
claude
Codex(~/.codex/config.toml):
# ~/.codex/config.toml
model_provider = "aicodewith"
model = "gpt-6.1-sol"

[model_providers.aicodewith]
name = "aicodewith"
base_url = "https://api.aicodewith.ai/chatgpt/v1"
wire_api = "responses"
experimental_bearer_token = "YOUR_API_KEY"
詳しくは Claude Code をサードパーティ API につなぐ方法 をご覧ください。
よくある質問
Creator Mode は新しいモデルですか?
いいえ。モード名であり、モデル選択で選んだモデルをそのまま使います。そこにランタイム確認、プラグイン管理、プラグイン作成のためのツールとスキルが加わります。今回は claude-sonnet-5-5 を使いました。
DeepSeek の API が必要ですか?
必要ありません。Harness は組み込みのサードパーティ提供元と、独自の OpenAI 互換エンドポイントに対応しています。aicodewith 接続で Claude、GPT、DeepSeek のモデルを使え、Creator Mode でのプラグイン作成もできました。
Creator Mode で入れたプラグインは安全ですか?
公式の Plugin Manager の README によると、インストールしたプラグインのコードは Harness のホストプロセス内で動き、ワークスペースのサンドボックスの外にあります。そのため plugin_manager の操作には毎回フルアクセスか個別の承認が必要で、検証でも確認が 1 回出ました。まず使い捨ての profile やディレクトリで試し、コードを読んでから普段の環境に入れてください。
ブラウザなしで Creator Mode を使えますか?
今回は Web UI で Creator mode を選びました。headless モードはタスクの実行とインストール済みプラグインの呼び出しに使い、プラグインのインストール自体は dsh plugin --profile <名前> add でコマンドラインからもできます。
プラグインのアンインストール方法は?
Creator Mode か Plugins 画面で Bundle を無効化・削除するか、コマンドラインで:
npx @deepseek-ai/dsh plugin --profile headless remove @local/todo-scan
# dependencies:
# - @local/todo-scan link:.../todo-scan
検証では削除後、profile の bundles リストから @local/todo-scan が消え、todo_scan を呼ぶよう頼むとモデルはそのツールはないと答えました。
関連記事
- DeepSeek Super-agent とは?アーキテクチャ、公式実験データ、dsh-superagent プロトタイプの検証
- DeepSeek V4.1 Flash 1017 の変更点と Claude Code / Codex での使い方
- Claude Code をサードパーティ API につなぐ方法:Base URL、API Key、モデル設定
- Agent Skills の使い方:Claude Code / Codex のインストール先と呼び出し方
出典:DeepSeek Harness GitHub · モデル設定ガイド · 初めてのプラグイン · CLI ヘルプ · 安全に関する注意 · DeepSeek Harness 公式サイト · @DeepSeekHarness の投稿(2026-11-03 確認)