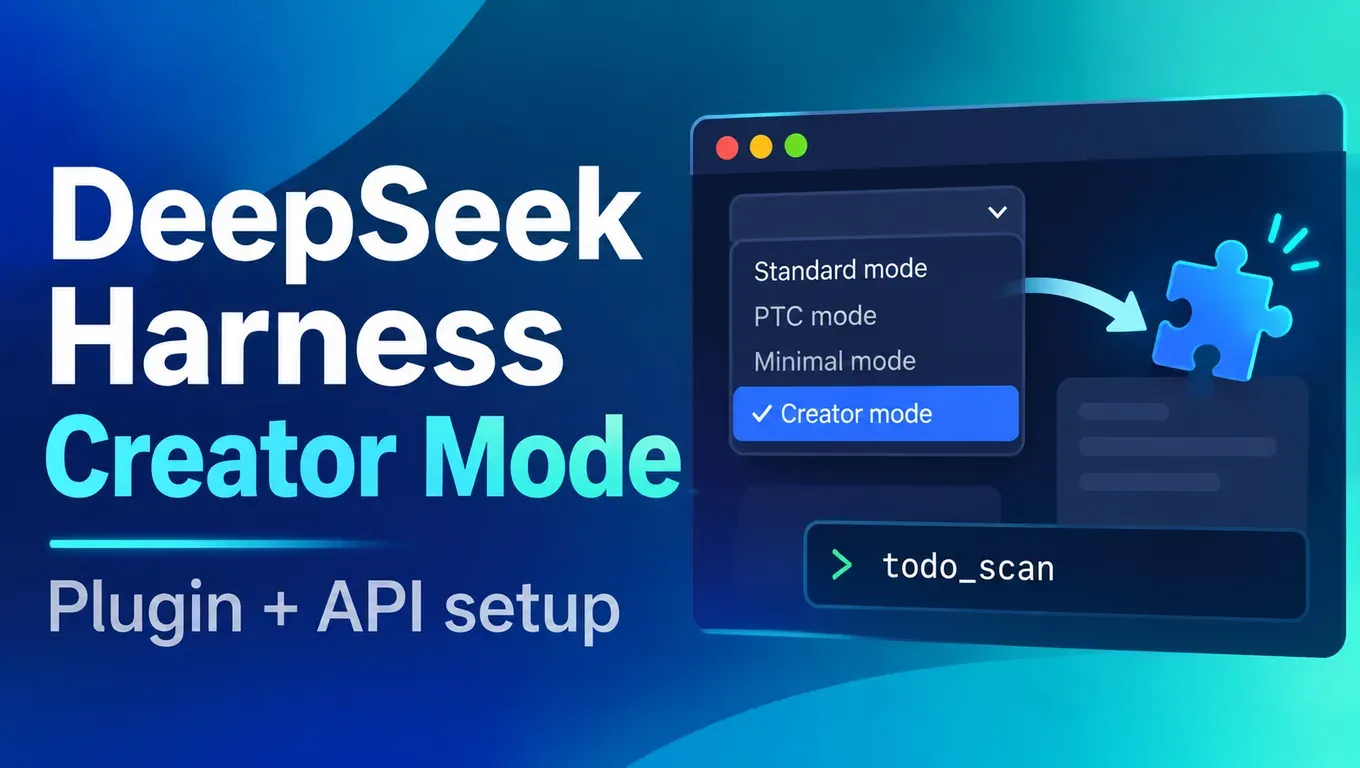
先说结论:Creator Mode 是 DeepSeek Harness 里专门用来「扩展 Harness 自己」的模式,你用一句话描述想要的工具,它会写插件、装进当前 profile,再检查是否加载成功。
- 据 @DeepSeekHarness 官方发布(11 月 2 日),Creator Mode 能把想法变成可用的插件,演示里有设计工作区、沙盒游戏和 3D LLM 可视化。
- Harness 本身用
npx @deepseek-ai/dsh web就能启动,我们 11 月 3 日下午(北京时间)在 Linux 上用 0.2.1-rc.5 实测:装好依赖约 37 秒。 - 它支持「Custom model API」:填 Base URL、协议和 Key,就能接 OpenAI 兼容的第三方 API。我们接 aicodewith 后,
claude-sonnet-5-5、gpt-6.1-sol、deepseek-flash三个模型都能正常调用工具。 - 用 Creator Mode 做一个
todo_scan插件:1 分 33 秒完成,写了 6 个文件并自动安装;之后在新会话和 headless 模式里调用,输出正确。
创建 API Key,在 DeepSeek Harness、Claude Code、Codex、Cursor 里接入 Claude 和 GPT →
DeepSeek Harness 和 Creator Mode 是什么
DeepSeek Harness(命令名 dsh)是 DeepSeek 开源的智能体框架(agent harness),GitHub 仓库用 MIT 协议。它的设计口号是「Everything is a Plugin」:工具、技能、界面面板、甚至「模式」本身都是插件,底层用 Cordis 插件框架组合。目前是开发者预览版,官方 README 明确写着后续会有不兼容更新。
在 Web 界面新建会话时,可以选 4 种模式(我们实测界面上的原文):
| 模式 | 界面说明 |
|---|---|
| Standard mode | 写代码、处理文件和信息,适合大多数任务 |
| PTC mode | 包含 Standard 的全部能力,更适合批量调用工具再整理结果 |
| Minimal mode | 只用终端和读图,适合测试和对比基础表现 |
| Creator mode | 通过对话定制 DSH:让智能体写插件加功能或界面,或组合工具和提示词做自己的模式 |
据官方 动态插件文档 和 Agent Preset 说明,Creator Mode 的内部 id 是 cordis。和 Standard 相比,它多了三样东西:
- 查看运行时:两个只读工具
cordis_inspect_list和cordis_inspect_query,能查当前有哪些服务、工具 schema 和配置 schema,不用去翻源码猜接口。 - 插件管理:
plugin_manager工具(Standard 里也有),能安装、启用、停用、删除 Bundle。插件配置属于当前 profile,对所有会话生效,重启后仍保留。 - 写插件的技能:自动挂载
cordis-plugin-development等技能,里面有写插件、写 Bundle、改模式的步骤和模板。
它用的还是你在模型选择器里选的模型。除了在新建会话时选,Plugins 页面的 Add plugin 菜单里也有「Let the agent create a plugin」入口,进的是同一个 Creator 流程。
几个第三方说法,供参考:
- 据 @rohanpaul_ai,这个功能 8 月就有了,11 月 2 日官方是发布了演示视频和 7 个示例背后的提示词。
- 据 @testingcatalog,Creator Mode 可以做游戏、工作类等不同场景的可复用插件。
- 据用户 @superalesha 反馈,他把 Kimi、GLM、MiniMax、DeepSeek 等开源模型都放在 Harness 里跑,还「通过一个插件加上了 GPT 模型」。
如果你想看 DeepSeek 另一个基于 Harness 的项目 Super-agent,可以看我们之前的《DeepSeek Super-agent 是什么?架构、官方实验数据与 dsh-superagent 原型实测测评》,本文不重复。
安装 DeepSeek Harness
准备 Node.js(我们用的是 22.23),然后一条命令:
# Node.js 22 or newer
npx @deepseek-ai/dsh --version
# 0.2.1-rc.5

npx @deepseek-ai/dsh web
# dsh web: http://127.0.0.1:3080/?token=...
本地启动会自动打开浏览器;在服务器或 SSH 里跑时加 --no-open,它只打印地址。地址里带 token,要用这个完整链接打开,直接访问 http://127.0.0.1:3080/ 会返回 401。
只想在终端里跑一次任务、不开网页,用 headless 模式,答案打到 stdout、诊断信息打到 stderr,适合脚本和 CI。命令参数见官方 CLI 帮助。
官方 安全说明 提醒:Harness 会执行模型生成的代码和命令、加载第三方插件,而且没有经过安全审计。建议在一次性虚拟机、容器或专用目录里跑,别直接对着重要项目和凭证。
DeepSeek Harness 接入第三方 API(aicodewith)
Harness 的模型配置在 Settings → Models。除了 DeepSeek 自己的卡片和内置的第三方服务商,还可以选 Custom model API,用来接中转、公司网关或自建服务。据官方 模型配置文档,协议有三种可选:OpenAI Chat Completions、OpenAI Responses、Anthropic Messages。
创建 API Key,接入 DeepSeek Harness →
方法一:在 Models 页面填写
Settings → Models → Add model provider → Custom model API
  Provider ID   aicodewith
  Base URL      https://api.aicodewith.ai/v1
  API protocol  OpenAI Chat Completions
  API key       (your aicodewith key)
  Models        claude-sonnet-5-5, gpt-6.1-sol, deepseek-flash
保存后,模型选择器里就会出现这三个模型。页面保存的 Key 会写到 ~/.dsh/.credentials.yaml,配置里只留一个引用。
方法二:直接写配置文件
页面写的其实是 profile 下的 cordis.patch.yml。用 dsh web 启动时 profile 叫 web,用 headless 时叫 headless。我们实测用的就是这一份(Key 用环境变量传,不写进文件):
# ~/.dsh/profiles/web/cordis.patch.yml
- id: llm-pi-ai
  config:
    providers:
      aicodewith:
        displayName: aicodewith
        apiKeyEnv: AICODEWITH_API_KEY
        api: openai-completions
        baseURL: https://api.aicodewith.ai/v1
        models:
          - id: claude-sonnet-5-5
          - id: gpt-6.1-sol
          - id: deepseek-flash
- id: agent-default-model
  config:
    provider: aicodewith
    model: claude-sonnet-5-5
然后在启动前导出 Key:
export AICODEWITH_API_KEY="你的 API Key"
npx @deepseek-ai/dsh web
Windows PowerShell:
$env:AICODEWITH_API_KEY = "你的 API Key"
npx @deepseek-ai/dsh web
配置改完不用重启,下一次请求就生效。先发一句话确认能通:
npx @deepseek-ai/dsh headless "Reply with exactly: harness ok"
# harness ok
我们的实测结果(11 月 3 日,北京时间):
| 测试 | 模型 | 结果 | 用时 |
|---|---|---|---|
| 回一句话 | claude-sonnet-5-5 | 返回 harness ok | 4.5 秒 |
| 回一句话 | gpt-6.1-sol | 返回 harness ok | 3.7 秒 |
| 写 hello.py 并运行(write + bash 两次工具调用) | claude-sonnet-5-5 | 输出 5050 | 8.2 秒 |
| 同上,改用 Anthropic Messages 协议,Base URL 填 https://api.aicodewith.ai | claude-sonnet-5-5 | 返回 harness ok | 3.0 秒 |
想用 DeepSeek 自己的模型,把 deepseek-flash 加进模型列表即可,模型介绍见《DeepSeek V4.1 Flash 1017 更新了什么?Claude Code / Codex 接入方法》。
用 Creator Mode 写第一个插件:todo_scan
目标:做一个 todo_scan 工具,扫描项目里带 TODO / FIXME 的行,返回 文件:行号: 内容,最多 50 条。
在 Web 界面点模式选择器,选 Creator mode,发送下面这段需求(我们用的是 claude-sonnet-5-5,权限是默认的 Workspace Write):
Write a DSH plugin that adds a tool named todo_scan. It takes an optional path
(default: the working directory), recursively scans text files for lines
containing TODO or FIXME (skip node_modules and .git), and returns a list of
file:line: text entries, at most 50. Install it into this profile and verify
it loaded.
中途它会弹一次确认,因为安装插件属于高权限操作,我们点了 Allow once。完成后的回复(节选):
Completed in 1m 33s

The todo_scan plugin is installed and loaded, and a test call returned correct results.
Install: @local/todo-scan installed with application: applied and no warnings.
Tool registration: todo_scan appears in the live tool list with the schema from my plugin.
...
It skips symlinks, binary files and files over 1 MiB.
If more than 50 matches exist, it returns 50 and marks the result as truncated.

Edited 6 files  +147 -0
它在工作目录里生成的插件结构:
todo-scan/
├── package.json        # "dsh": { "bundle": { "patch": "./cordis.patch.yml" } }
├── cordis.patch.yml    # inserts the plugin into the profile
├── index.js            # 127 lines: registers the todo_scan tool
├── icon.svg
└── locale/
    ├── en.json
    └── zh.json
关键是 cordis.patch.yml 和 index.js。前者告诉 Harness 把这个插件插进 profile:
# todo-scan/cordis.patch.yml
- insert:
    - id: todo-scan
      name: '@local/todo-scan'
      config: {}
后者注册工具,写法和官方 插件入门教程 一致:导出 name、inject 和 apply,在 apply 里调用 ctx.tools.register:
// todo-scan/index.js (abridged)
export const name = 'todo-scan'
export const inject = ['tools', 'workingDirectory']

export function apply(ctx) {
  return ctx.effect(() =>
    ctx.tools.register({
      name: 'todo_scan',
      description: 'Recursively scan text files for lines containing TODO or FIXME ...',
      parameters: {
        type: 'object',
        properties: { path: { type: 'string', description: 'File or directory to scan ...' } },
        additionalProperties: false,
      },
      output: { schema: { /* entries: string[], truncated: boolean */ }, render: (_a, v) => [/* text */] },
      async execute(args, exec) {
        const cwd = await ctx.workingDirectory.ensure(exec.agent, exec.signal)
        return scan(args.path ? resolve(cwd, args.path) : cwd, exec.signal)
      },
    }),
  )
}
安装后 profile 的 package.json 里多了一条 link: 依赖,bundles 里多了 @local/todo-scan,重启后也会保留。
验证插件
新开一个 Standard 会话,让它调用 todo_scan,用时 7 秒。我们故意放了一个 60 行 TODO 的文件,结果正好在 50 条截断:
many.txt:1: TODO item 0 many.txt:2: TODO item 1 ... many.txt:50: TODO item 49 (truncated at 50 entries)
再测「跳过 node_modules 和 .git」:在 demo/node_modules 和 demo/.git 里也放了 TODO,同时把插件装进 headless profile,用命令行调用:
npx @deepseek-ai/dsh plugin --profile headless add link:/absolute/path/to/todo-scan
# dependencies:
# + @local/todo-scan <- .../todo-scan
# Done in 23ms using pnpm v12.15.0

npx @deepseek-ai/dsh headless --json "Call the todo_scan tool once with path demo and paste its raw output verbatim, nothing else."
{"type":"tool_call","tool":"todo_scan","input":{"path":"demo"}}
{"type":"tool_result","status":"completed","result":"src/app.py:2: # TODO: handle empty input\nsrc/app.py:4: # FIXME: off by one"}
{"type":"final","text":"src/app.py:2: # TODO: handle empty input\nsrc/app.py:4: # FIXME: off by one"}
只返回了 src/app.py 里的两行,node_modules 和 .git 里的都被跳过。同一个插件换三个模型调用:
| 模型 | 是否调用 todo_scan | 输出 | 用时 |
|---|---|---|---|
| claude-sonnet-5-5 | 是 | 两行,正确 | 5.5 秒 |
| gpt-6.1-sol | 是 | 两行,正确 | 6.9 秒 |
| deepseek-flash | 是 | 两行,正确 | 7.6 秒 |
常见报错
Key 错误:
{ERR401}
检查 AICODEWITH_API_KEY 是否是完整的 Key,前后有没有空格。
没导出环境变量:
dsh: MISSING_CREDENTIAL: llm-pi-ai: no credential for provider route "aicodewith"; its profile
resolves AICODEWITH_API_KEY, which is not set — store AICODEWITH_API_KEY through the credentials
service (the web Models page writes it) or export it ...
apiKeyEnv 写的变量名必须在启动 dsh 的那个终端里导出,或者在 Models 页面保存一次 Key。
默认模型不在列表里:
dsh: UNKNOWN_MODEL: pi-ai provider "aicodewith" has no configured model "claude-sonnet-9"
agent-default-model 里的 model 必须出现在该服务商的 models 列表中。
模型 id 写错(网关不认识):
{ERR400}
模型 id 以 aicodewith 模型列表为准,可以在 Models 页面点 Fetch available models 拉取。
| 现象 | 原因 | 处理 |
|---|---|---|
| 打开 http://127.0.0.1:3080/ 显示 401 | 没带启动时打印的 token | 用终端打印的完整链接打开 |
| AUTH: 401 | Key 错误或已删除 | 换成正确的 Key |
| MISSING_CREDENTIAL | 环境变量没导出 | 导出变量或在 Models 页面保存 Key |
| UNKNOWN_MODEL | 默认模型不在 models 列表 | 把模型加进列表 |
| INVALID_REQUEST: 400 模型…不存在 | 模型 id 网关不认识 | 按模型列表改 id |
| 插件装了但工具没出现 | 插件没加载或加载报错 | 在 Creator Mode 里让它查看已装 Bundle 和警告 |
在 Claude Code / Codex / Cursor 里做同类事
Harness 的插件是「给智能体加一个新工具」。在其他客户端里,最接近的做法是写一个 Skill(把步骤和脚本打包成文件夹)或接一个 MCP 服务:
| 客户端 | 放 Skill 的位置 |
|---|---|
| Claude Code | ~/.claude/skills/<名字>/SKILL.md |
| Codex | ~/.agents/skills/<名字>/SKILL.md |
| Cursor | ~/.cursor/skills/ 或 ~/.agents/skills/ |
具体写法和触发方式见《Agent Skills 怎么用?Claude Code / Codex 安装目录、触发方式实操》。
这些客户端同样可以接 aicodewith。Claude Code:
export ANTHROPIC_BASE_URL="https://api.aicodewith.ai"
export ANTHROPIC_AUTH_TOKEN="你的 API Key"
claude
Codex(~/.codex/config.toml):
# ~/.codex/config.toml
model_provider = "aicodewith"
model = "gpt-6.1-sol"

[model_providers.aicodewith]
name = "aicodewith"
base_url = "https://api.aicodewith.ai/chatgpt/v1"
wire_api = "responses"
experimental_bearer_token = "你的 API Key"
更多细节见《Claude Code 如何接入第三方 API?Base URL、API Key 与模型配置教程》。
常见问题
Creator Mode 是一个新模型吗?
不是。它是一种模式,用的还是你在模型选择器里选的模型,只是多了查看运行时、管理插件和写插件的工具与技能。我们这次用的是 claude-sonnet-5-5。
一定要用 DeepSeek 的 API 吗?
不用。Harness 支持内置的第三方服务商和自定义 OpenAI 兼容接口,我们实测接 aicodewith 后 Claude、GPT、DeepSeek 模型都能用,包括在 Creator Mode 里写插件。
Creator Mode 装的插件安全吗?
据官方 Plugin Manager 说明,装好的插件代码在 Harness 主进程里运行,不在工作区沙盒内;所以 plugin_manager 的每次操作都需要完全访问权限或单次确认,我们实测时就弹了一次确认。建议先在一次性 profile 或目录里试,看过代码再装到常用环境。
不开浏览器能用 Creator Mode 吗?
我们这次是在 Web 界面里选的 Creator mode。headless 模式我们用来跑任务和调用已装好的插件;插件安装也可以用 dsh plugin --profile <名字> add 在命令行完成。
插件怎么卸载?
在 Creator Mode 或 Plugins 页面里停用、删除对应 Bundle;也可以用命令行:
npx @deepseek-ai/dsh plugin --profile headless remove @local/todo-scan
# dependencies:
# - @local/todo-scan link:.../todo-scan
我们实测卸载后,profile 的 bundles 列表里不再有 @local/todo-scan,再让模型调用 todo_scan,它回答没有这个工具。
延伸阅读
- 《DeepSeek Super-agent 是什么?架构、官方实验数据与 dsh-superagent 原型实测测评》
- 《DeepSeek V4.1 Flash 1017 更新了什么?Claude Code / Codex 接入方法》
- 《Claude Code 如何接入第三方 API?Base URL、API Key 与模型配置教程》
- 《Agent Skills 怎么用?Claude Code / Codex 安装目录、触发方式实操》
来源:DeepSeek Harness GitHub · 官方模型配置文档 · 官方插件入门 · CLI 帮助 · 安全说明 · DeepSeek Harness 官网 · @DeepSeekHarness 发布(核对于 2026-11-03)